

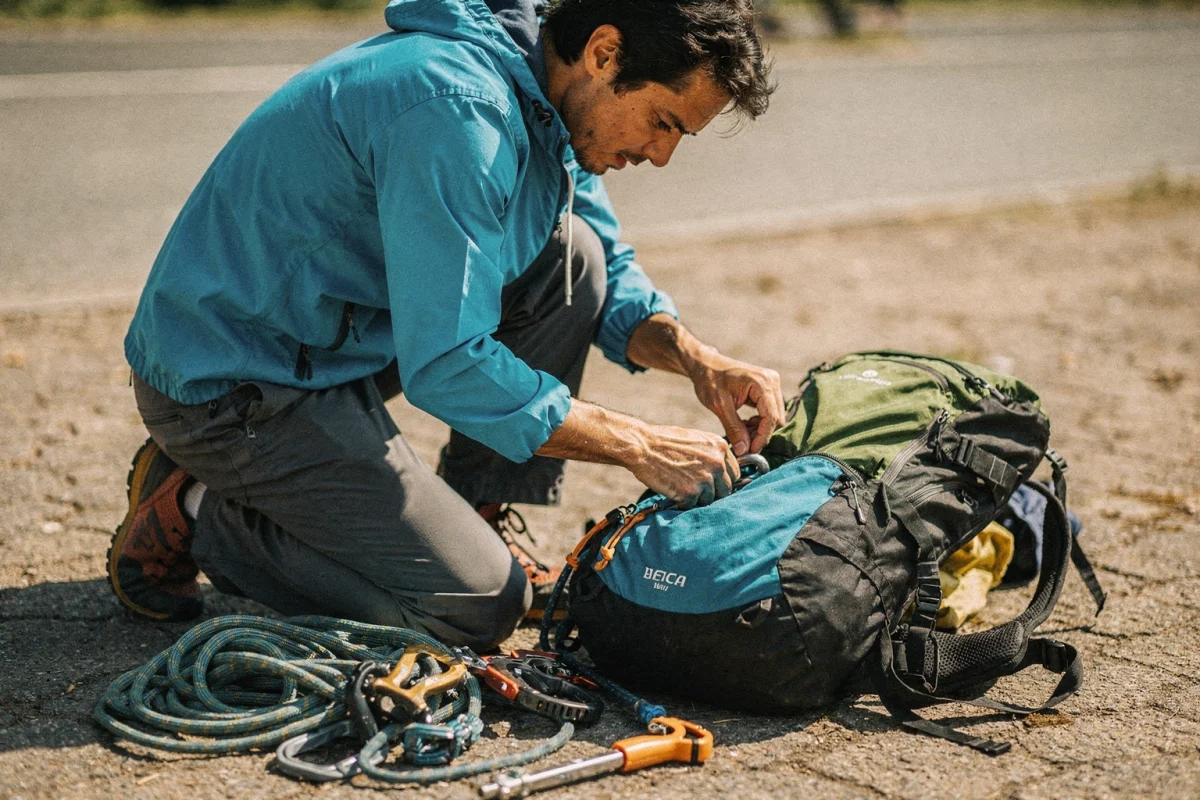
How to choose the right 30-liter surf bag
You might be getting into a sport that already brings people together. 120,717 licensed drivers In France for the 2025/2026 season, but on the approach route, a poorly chosen backpack is spotted in three minutes. Cord that slides, a wet back, shoes that are impossible to find, a belt that cuts: the day is ruined even before the first descent. In this Snap Climbing guide, you will learn to choose a thirty-liter climbing backpack that holds its load, organizes itself quickly, and remains stable on technical terrain. To compare the Snap climbing bags, Keep this method in mind and test it point by point.
The essentials in 30 seconds
A «thirty liters» is judged by the actual usable volume (cord, helmet, textile, water), not by the label.
Prioritize an organization that avoids spilling everything on the ground: opening, quick pockets, dirty rope area.
Comfort comes from the carrying system (waist belt, shoulder straps, stability), not from the thick padding.
Validate on the field with your full load, on an approach march, then adjust the setting.
Before buying, start by determining what you really want to wear.
Pre-requisites for choosing without making a mistake (and saving time in the store)
Tools and access needed
To choose a cliff bag, you need more than just seeing it in photos. Bring your full gear (rope, harness, helmet, booties, magnesium, water, jacket), and ideally a short hiking-style hike. Without this context, you’re mainly evaluating the look, not the use.
In terms of method, a measuring tape helps to check whether the rope and the helmet fit without forcing them, but the essential thing remains the carrying test. To gauge the load, a simple reference point exists in the outdoors: a loaded backpack should not exceed about 20% Body weight according to REI. In the mountains, you won’t always be in this zone, but this figure serves as a guideline to avoid buying a bag that is too minimalist.
Estimated time and level of difficulty
It takes about a quarter of an hour to prepare your «test load», then another half hour to compare two models, including the adjustment. The difficulty is moderate: it's mainly about being rigorous and testing with real movements (walking, bending over, grabbing the jug, taking off the jacket without opening it).
Checklist of technical conditions before starting
- Your equipment is complete, including water, a rain jacket, and a snack (it’s often the forgotten items that make the organization blow up).
- You know how to transport the rope (inside, on top, in a quick-release strap, on a tarp).
- You identify your typical approach (trail running or hiking, steep climb, mountain terrain, technical terrain).
- You plan to have a release in October as well as in the summer: an extra layer changes the logic of volume.
- You list your current irritants (unnecessary thermal insulation, real-life shock absorption, lack of support, slow phone access).
Test with your actual load, not with newspaper paper.
Use a load reference (the REI 20% rule) to avoid a bag that is too small.
Your approach to hiking conditions your choice more than your climbing level.
Once the framework is in place, you can define your needs without being influenced by «trendy» models.
Defining your real needs for a thirty-liter canyon bag
Type of outings and usual duration
A thirty-liter backpack often corresponds to the «classic» day: a short or medium approach, one or two long hikes by trail, picnic, and an extra layer. If your outings are very light (a ten-minute trek from the parking lot), you may be overpaying for a structure that is too sturdy. Conversely, if your approach hike resembles a short mountain race, you need real support and a stable carrying system.
Keep a simple rule: the more technical your approach is, the more important stability is (effective belts, straps that don’t slip, a bag that doesn’t turn). That’s the difference between «walking with» and «fighting against».
Equipment list according to your discipline (and what really changes the volume)
In sport climbing, the duo that decides on the useful volume is almost always a rope + helmet. On the big routes, you quickly add stiffer approach shoes, a down jacket, water, and sometimes a small first aid kit. In the big wall, it’s a different world (crash pad), but many climbers want an all-purpose bag that can be used both indoors and outdoors, so the accessory pockets become key items.
Weather constraints and seasonality
In summer, the trap is water and ventilation. In October, the trap is the accumulation of layers and humidity. A bag that «fits» over a T-shirt can become uncomfortable with a fleece, a down jacket, and a rain coat. Also consider the return: wet rope, magnetite dust, abrasive rock. Your organization must provide a dirty area, otherwise you will get everything dirty.
Target budget and frequency of use
If you climb frequently, robustness (fabric, zippers, reinforced bottom) becomes an investment, not a luxury. Conversely, if your outings are infrequent, a simpler backpack may suffice, provided you don’t sacrifice carrying capacity. The best purchase isn’t the most expensive: it’s the one that gets you out more often, without obsessing over lightness at the expense of comfort.
Your outings (short approach vs. committed hiking) dictate the priority: stability first, organization afterwards.
In October, plan for a «wet and dirty» logic (cord, magnetism, jacket).
The good bag is the one you use often, not the one that wins a lightness contest.
Once your needs are clarified, you must now verify that the announced volume corresponds to your actual needs.
Validate the useful volume and an organization that avoids emptying everything
Evaluate the useful volume with your complete equipment
Two bags labeled «thirty liters» can behave differently depending on the shape of the main compartment and the space lost by the reinforcements. The most reliable test remains the actual stacking, in your order of use: what you want to grab first must be accessible without having to dig through it.
A concrete detail that counts: your cord may be longer than expected. Petzl reminds you that a new cord announced at the 70 m It can measure up to 73 m, which changes the «real» volume to be packed if you transport it in it.
Opening the suitcase or loading from the top: choose according to your way of organizing yourself
The «suitcase» opening (large zip) facilitates quick access to the boots, harness, and magnesium. This is very convenient in the canyon, especially when you alternate between climbing and waiting. Loading from above is often simpler, lighter, and more tolerant of rapid fill-ups, but it encourages digging around.
| Organization | Opening the suitcase | Access from the top |
|---|---|---|
| Access to slippers and a harness | Very fast, without piling up | Slower if the rope is on top |
| Managing the «clean/dirty» | Easy if the inner compartment is included | Depends on the external pockets |
| Risk of spilling everything on the floor | Low (if you organize in layers) | Higher (vertical drill) |
| Relevant for | Sporty Falaise, mixed days | Fast hikers, simple approach |
Prioritize quick and safe storage
An effective avalanche sac is not the one with the most pockets, but the one whose pockets serve a purpose. Aim for: a topo/phone pocket that is accessible without opening the sac, a secure key pocket, and a textile area (down jacket, rain jacket) that can be quickly removed when the wind picks up in the mountains. Beware of «decorative» pockets that create friction points on rock.
Flux: Cord (closest to the back) → Compressible textile (around it) → Bootie (in the middle) → Helmet (top, lined) → Socks (quick access) → Magnets + accessories (dedicated pockets) → Water (side, balanced).
The useful volume is measured with your actual rope, not with a theoretical volume.
Choose the opening according to your dominant hand: access quickly or fill quickly.
Distribute the load for stability on trails and technical terrain.
When the organization is clear, comfort depends mainly on the carry and adjustment.
Choosing a portage that remains stable and manageable in approach
Ribbed fillet or dense mousse: what really makes a difference
The stretched net ventilates well, but it removes the load from the back. In the canyon, with rope and hardware, this displacement can increase the slosh on steep trails. The dense foam adheres more to the load, often at the cost of a warmer back. If you end up getting wet frequently, look for a compromise: ventilation channels and breathable textiles, rather than an «isothermal back» often used as a vague argument.
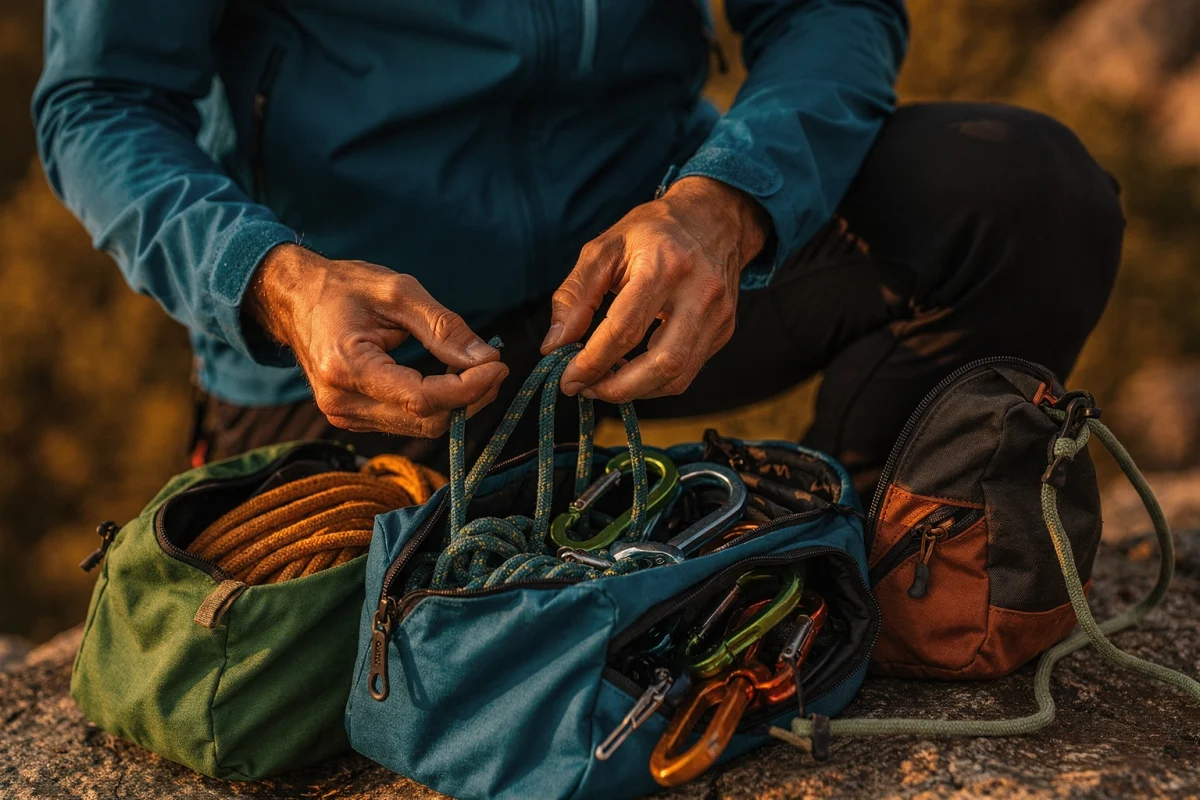
Suitable belts and suspenders: look for support, not softness
A good belt doesn’t necessarily have to be thick: it should fit tightly without bunching and not slip when you raise your arms. The shoulder straps, on the other hand, stabilize and guide you. On backcountry hiking, you want the load to be «live» on the hips.
A carry-on rule often comes up in backpacking: the «80/20» idea where 80% Weight rests on the belt and 20% on the shoulders. In the mountains, it’s not an exact science, but it’s an excellent test: if your shoulders burn, the belt or the adjustment isn’t doing the job.
Stability in technical approach: the test that doesn't lie
Load the bag, tighten the belt, then perform three movements: climb a high step, bend over like you’re picking up a load, and turn your torso to look behind you. If the bag is dragging you, it’s a problem with your center of gravity (loads too far from your back) or with your posture (straps that aren’t adjusted properly, unnecessary or poorly placed chest straps).
- Place the belt on your hips, tighten it until you feel a firm support without any breathing difficulties.
- Tighten the straps just enough to secure the bag, without «pulling» the weight upwards.
- Adjust the chest strap to stabilize, not to compress.
- Walk for a few minutes, then slightly tighten the belt (it will snap into place).
Stability takes precedence over ventilation if your approach is technical.
The belt should carry most of the load (80/20 logic) to avoid fatigue.
A good adjustment is valid in motion, not in front of a mirror.
Once the carry has been validated, secure the items that pose the most problems in the ravine: the rope and the helmet.
Secure the transport of the rope and the helmet (without upsetting the bag)
Effective and quick rope slings
You have three reliable options: cord inside (clean, stable), cord above under two straps (fast), or cord on a fixed tarp (clean and fast). The bad scenario is the cord «laid» under a simple elastic. On technical terrains, it slides, you lose balance, and it hits the helmet.
To illustrate the importance of this issue, the rope is a long and heavy object. Petzl, for example, provides a rope intended for the rock face with a weight of approximately 60 g/m According to the models, this makes the distribution and tightening of the straps crucial on the trail.
Reliable and compatible helmet holder
A helmet must prevent the helmet from coming off when you lower yourself. Also check the compatibility with your helmet (different shapes, more or less ventilated shells). The helmet must not be the first thing to be torn off by a branch, nor the one hanging on the side.
Location of the tarpaulin and management of the dirty rope
The tarp is an organizer. Without it, the rope gets dusty and the magnets, then you put it all in the bag. The ideal is a dedicated location (front pocket or bottom pocket), separate from the textiles. If you don’t have a compartment, use a lightweight inner bag to insulate it.
Wet rope and magnesium dust
In autumn, wet cord is common, especially after a cool morning in the mountains. Plan to have a «sacrificial» fabric (small inner bag or tarp) to avoid turning the main compartment into a sponge. The goal is not to have a waterproof bag, but a simple, reproducible system that prevents you from washing everything too often.
Two simple and tight straps are worth more than an approximate elastic band.
Separate the «dirty rope» and textile to maintain a sustainable organization.
The compatibility of the helmet mount is tested with your helmet, not on a catalog.
When the harness and helmet are mastered, durability becomes your next decisive criterion.
Evaluate the durability of the fabrics, the bottom and the zippers (without overpaying)
Deniers, reinforcements and expensive zones
In the canyon, the friction comes from the rock, the loose material, and repeated manipulations (putting the pack on, pulling it up, loading it). Don’t just focus on the number of dollars displayed. Instead, look at where the reinforcements are: bottom, corners, main zip area, area for contact with the rope.
If you are undecided between a «very lightweight» bag and a «more robust» bag, remember the load-carrying logic. REI reminds you that a loaded backpack should not exceed about 20% body weight: if you are often overweight, the structure, materials and seams become more stressed, so the robustness is rational.
Checking the bottom of the bag and the seams
Inspect the bottom: double thickness, padding, visible reinforcement. Press and slightly twist to feel the firmness. Look at the seams around the straps and the waistband: that’s where it starts to sag when you wear it often.
Choose durable and easy-to-pull zippers
A main zipper should open with one hand, with zips that are usable when your fingers are cold in October. Also check the curvature: a zipper that makes a sharp angle is more exposed. In the mountains, you are working quickly, often standing, sometimes on a slope. The zipper must follow suit.
Anticipate rock rubbing and landslides
A «solid» backpack doesn’t necessarily have to be heavy, but it must be consistent. Some hikers prefer very minimalist models, like the Speed Lite for their obsession with lightness, or multipurpose bags like the Tempest. On abrasive rock, a more sturdy choice can evoke the Swiss robustness of the Lithium range. The idea isn’t to replicate hiking, but to understand the trade-off: the more you place the backpack on the ground, the more you need to strengthen it.
Look for reinforcements in the right places (the bottom, the corners, the zip), not just in the marketing rhetoric.
A zip that can be used with cold fingers is worth more than a «design» zip.
Your frequency of use dictates the level of robustness, not your ego.
Once the solidity has been judged, there remains a concrete arbitration: the weight in vacuum and the useful accessories.
Compare weight, accessories, and compatibility (without losing versatility)
Set a realistic weight goal for the vacuum bag
Weight counts, but it shouldn’t blind you. A very lightweight backpack that forces you to pack everything outside (helmet, tarp, rain jacket) wastes time and energy. Aim for balance: light enough to walk, structured enough to carry. If you’re often close to the rule of thumb, you’ll find it easier to carry everything. 20% With total load, an effective belt and stable shoulder straps will be more profitable than a few grams gained.
Top-loading pockets, phone, keys: the ergonomics that change the way you get out
An accessible phone pocket without opening the bag prevents the bag from getting dirty with dust. An internal key pocket prevents having to hunt for the key loop at the foot of the steps. A small «topo» pocket prevents you from having to fold the paper in any particular way. These are small details, but they give the impression of a «well-thought-out» bag.
Hydration: water bottle or water pouch
In the canyon, the canteen is often simpler. It fills easily, cleans well, and is easy to share. A water pouch can be useful if you like to drink while walking, but it requires a proper system (tube, cleaning). Especially test the access: taking out a canteen should not make you feel unbalanced on a narrow trail.
Compatibility of the down jacket and rain jacket
The useful test: store your down jacket and rain coat so that you can take them out without opening them too much. On a mountain day, the wind picks up quickly. The backpack must allow for a «reflex» organization. If you have to unload everything, you waste time and you get cold.
| Element | To be checked in store | Why it is decisive |
|---|---|---|
| Phone pocket | One-hand access, secure closure | Less stops, less dust |
| Corde system | Two anchor points, quick tightening | Stability during approach hiking |
| Sale zone | Front pocket or separate lining | Clean textiles, a more durable bag |
| Waist belt | Progressive tightening, no slipping | More maintenance, less fatigue |
| Travel format | Compact profile if you are aiming for the cabin compartment | Versatility for travel + climbing |
The weight at rest never compensates for a bad belt or a bad fit.
The useful accessories are those that prevent having to put the bag down and search it.
Consider clothing compatibility and hydration, especially in the mountains.
Do you want to apply this method the next time you go out? Prepare your full load, then test two bags on a approach walk.
There remains one often overlooked step: field validation, then final adjustments.
Validate in the field and adjust until you forget the bag
Testing the actual load on an approach ramp
The most revealing test is not long: a short hike with elevation gain is enough. Walk, then take breaks like in the canyon. Take off your jacket, put it back on, have a drink, and get your sneakers back on. If you have to open it wide every time, the organization isn’t for you.
Controlling pressure points and swaying
Pressure points appear quickly: collarbones, lower back, iliac crests. Swaying, on the other hand, often comes from a center of gravity too far from the back. Re-adjust: first the waist belt, then the straps. Remember the often cited «80/20» logic, which is often used in carrying, with 80% more weight on the belt: if that’s not how you feel, adjust.
Verify quick access to critical equipment
Critical equipment is what prevents you from having a bad time: water, warm sleeping bag, emergency first aid kit if the day drags on, phone, first aid kit. A good climbing backpack is not just about «carrying»: it allows you to act quickly. On an exposed trail, you don’t want to stop for long to search.
Matrix of common problems and simple corrections
| Problem identified | Probable cause | Correction of terrain |
|---|---|---|
| Burning shoulders | Ineffective belt or too low | Pull the belt up over the hips, tighten it, then release the straps slightly. |
| Bag that pulls back | Load away from the back (cord too external) | Bring the cord closer to your back, put the fabric around it to secure it. |
| Access to slippers too slow | Vertical organization, no pocket | Create a dedicated area (top of the bag) or switch to a luggage compartment opening |
| Systematic impact protection | Insufficient ventilation and too much pressure | Loosen the layer against your back, adjust the tension, prioritize breathable fabric |
| Cord that slides over | Straps too short or too elastic | Pass to two anchor points, tighten, and check the tightness after a few minutes of walking. |
A good backpack is perfect for on-the-go use, on your typical trail.
Most of the pain comes from a malfunction, not from an «irreparable» defect.
Adjust until you no longer think about it: that’s the best indicator.
After this method, questions often return to the total weight, the opening and the balance of the rope.
FAQ climbing bags thirty liters (quick answers, terrain)
What total weight should be aimed for for a day of climbing the rocks?
Aim for a weight that you can carry without breaking your posture on an approach hike. As a benchmark, REI mentions a bag loaded around your waist. 20% the weight of the body. When climbing, you can go beyond this limit, but if it happens frequently, choose a more structured belt and carrying system, rather than an ultra-lightweight backpack.
Opening the suitcase or loading from the top: how to choose?
Choose according to your dominant hand. If you want to access the booties, harness and magnets without taking everything out, the suitcase opening is more fluid. If you fill quickly and organize them into «layers,» accessing them from the top is sufficient. On an October trip, the suitcase opening also simplifies the handling of wet layers.
How to wear the rope without imbalance?
Wear it as close to your back as possible, secured by the textile, or attached to it with two tight straps. Avoid the rope at a single point of attachment. Petzl reminds you that a rope advertised at 70 m It may be longer new, therefore more voluminous. The further it is from the back, the more it pulls back on the trail.
Why does the belt change everything on technical courses?
Because it stabilizes the load and prevents your shoulders from doing all the work. The «80/20» carry-on logic cited by Backpacker (with 80% the weight on the belt) illustrates the objective well. In terms of technical approach, this support limits bobbling and fatigue, so you arrive more refreshed at the foot of the slopes.
What are common mistakes when trying on clothes?
The most common: try on empty, then buy based on a deceptive sense of comfort. Another mistake: tighten the straps to «soothe,» instead of adjusting the belt first. Finally, underestimate organization: if you have to empty everything on the floor to find the magnets, your bag won’t match your techniques and pace of outings.
Choosing a thirty-liter avalanche sac isn’t about chasing the perfect model: it’s about aligning the useful volume, organization, carryability, and durability with your actual outings. Apply the method: full load, testing on the trail, adjustment, then adjustments. By doing this, you’ll gain comfort, time on the trail, and versatility that lasts, in both the mountains and on the avalanche slopes.
 Français
 English (UK)


