


Waterproof climbing backpack: is it really necessary?
According to Météo-France, The number of rainy days per year varies from about 50 near the Mediterranean to more than 150 at high altitude or on the Brittany coast. In other words: if you go outside, you will eventually get wet. The real question isn’t “does it happen?”, but “what can I lose when it does happen?”.
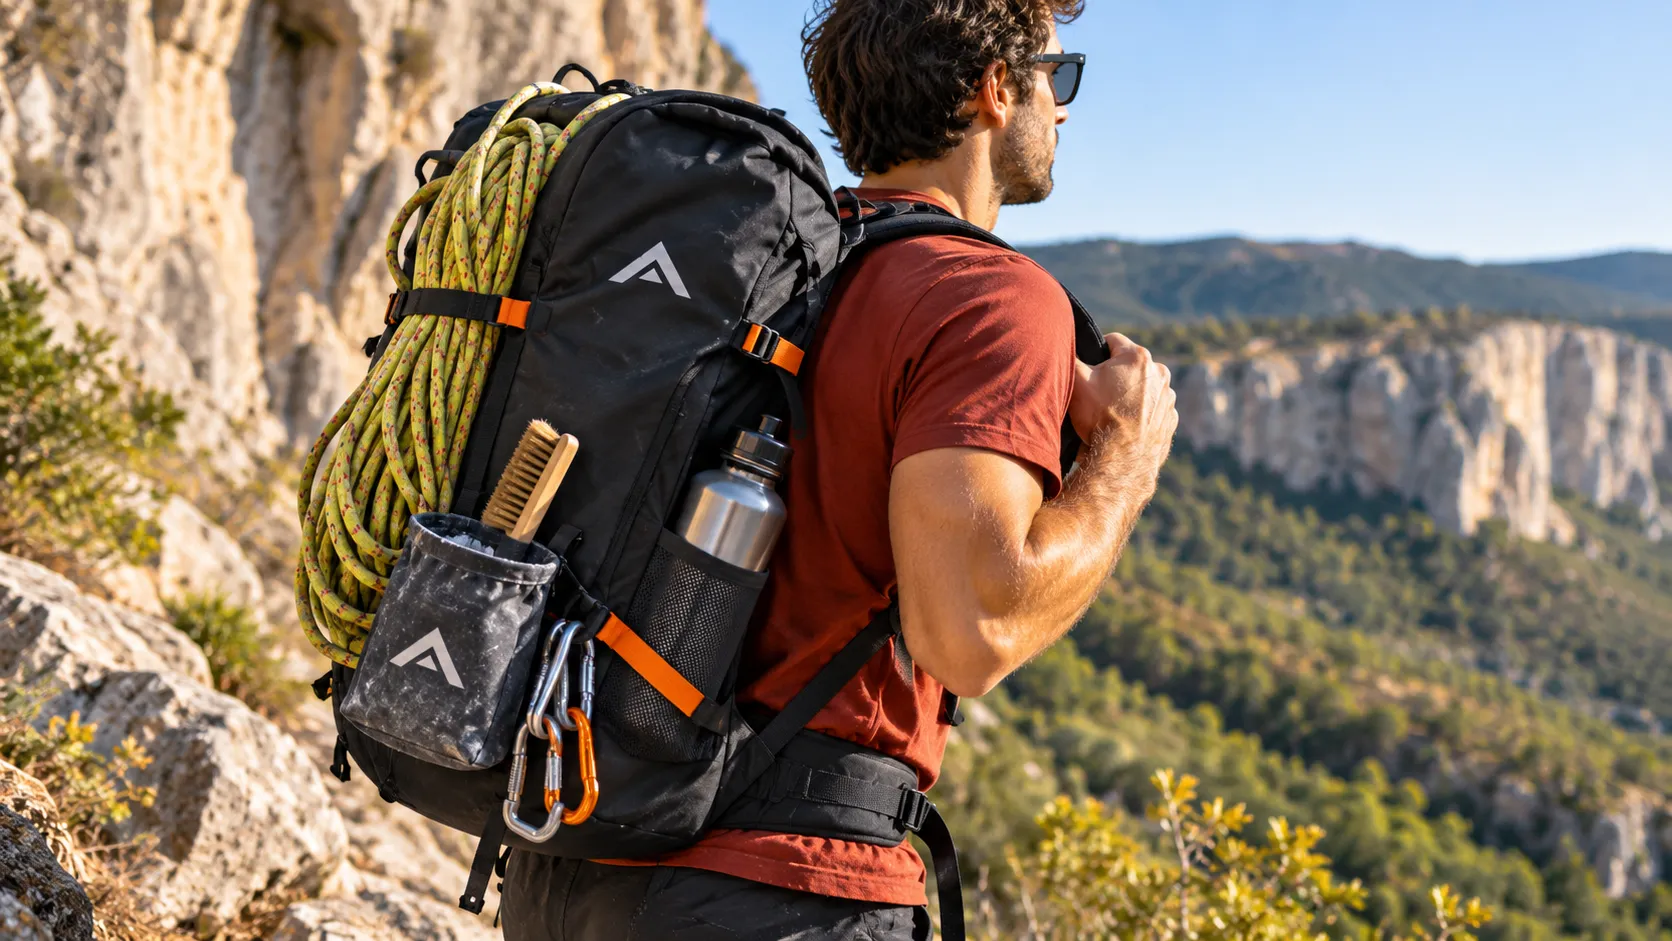
In this article, you’ll understand what an impermeable backpack actually protects, what marketing overlooks, and how to build a simple strategy to keep your critical belongings dry. To explore the carry options, see our selection of Snap climbing bags.
And if you’re the kind of person who wants a quick answer before setting off on your journey, you’ve come to the right place: here, there are no vague promises; only concrete choices, with a method that can be applied the next time you go out.
The essentials in 30 seconds
An “impermeable” bag does not protect everything: the seams, the back and the closures are often still weak points.
The best approach is in layers: bag + external protection + internal compartments that are waterproof for fragile contents.
Sealing becomes non-negotiable as soon as you bring down down feathers, electronics, or when you go on a long hike / mountaineering trip.
A simple organization system avoids closing errors, speeds up handling, and limits moisture from accumulating.
Now that the framework is in place, let's start with the most important one.

Avoiding critical damage when rain enters the cliff
Electronics, topo, GPS: the outage that deprives you of information
The first risk is not “getting wet”. The first risk is losing access to useful information at the wrong time. A phone that turns off, an external battery that gets lost, a paper draft turned into mush: you lose your reading path, your relay photos, your length captures, and sometimes your navigation when returning.
As the climb escalates, the degradation is insidious: you can still climb, but you climb less well. You hesitate, you time your moves, you extend the exposure. And when the weather turns, every minute counts. The problem isn’t the water “per se”; it’s the domino effect: less information, more mistakes, more stress, more manipulation.
The classic trap is false security: “my phone is resistant”. Resisting does not mean being ready to endure an entire day in a wet bag, against a wet fabric, with temperature variations. Water also enters through condensation, capillary action, and pressure when you place the bag on the ground.
Field reflex: the electronics must be housed in a dedicated pocket that is easy to close and that you don’t open every time you take a break. If you take your topo out every ten minutes, you’re introducing ten times the amount of water into the system. The best seal is also achieved by avoiding opening the pocket.
Textiles, down, insulation: when heat gives way
In the mountains, a wet garment is not just unpleasant. It makes you adopt a survival mindset: you move less, you wait longer, you lose heat more quickly. Down is particularly sensitive: it clumps together, loses its buoyancy, and its insulating power drops as soon as it absorbs moisture. This is not a question of comfort; it is a choice of safety, especially when the day extends, when the wind picks up, or when you end up in the shade.
In an “materials and durability” approach, the issue is twofold. On the one hand, protecting the insulation (down jacket, warm layer, or even sleeping bag if you camp). On the other hand, avoiding saturating the inner fabrics of the bag: a wet bag becomes an accelerator of moisture, even if the rain stops. You put on a wet layer, you put your hand back in, and you pull out another already wet layer.
A simple strategy is to separate what should remain dry (insulation) from what can be wet (windbreaker, thin polar fleece, gloves). This separation is not a luxury. It is a prerequisite for recovering, getting back on the road, and not ending up with “I’m shivering, so I’m going to be quick”.
A useful little tip: if you start thinking about your socks in the middle of the day, it’s often because you’ve already lost the battle against being too dry. This detail often signals the rest of the story: shoes that remain cold, skin that gets wet, blisters on your return from the gym.
Wire and hardware: corrosion, friction, trust
A wet rope can become heavier to carry, more difficult to handle, and slower to dry. But the issue goes beyond logistics. The carabiners, hooks, and even some screws and springs do not like either the charged water (tide) or the prolonged humidity in a closed bag. Salt, in particular, acts as a catalyst for degradation.
In a marine environment, technical documents on corrosion indicate that steel can exhibit average corrosion rates of around 50 to 200 µm per year, depending on the conditions. This reminds us that repeated wet storage is never neutral. The idea is not to scare you: it’s to sort you out. What works mechanically (springs, axes) deserves to be kept away from stagnant humidity.
Sustainability here is a combination of micro-habits: dry it out, ventilate it, avoid letting the hardware “swim” in the bottom of the bag, and limit the mixture of water + dust + salt. This mixture forms an abrasive paste that wears on the straps, tarnishes the parts, and makes handling the equipment more difficult.
Persistent humidity: odors and mold, the real long-term cost
Rain that falls for an hour is rarely the focus of the discussion. The real cost comes from the moisture that remains. A wet bag, placed in the trunk, closed, then reused, becomes an incubator for odors and microorganisms. This eventually permeates the textiles, and degrades the comfort of use. The more you “forget” about the moisture, the more it returns as a boomerang.
To put the risk into perspective: at 60 % % relative humidity, visible mold growth is possible on certain surfaces, according to a reference resource on humidity and deterioration agents. Outdoors, you do not control the ambient air. However, you do control the air inside your bag.
The key point: a poorly managed “impermeable” bag can be worse than a well-managed simple bag, because it retains moisture. The good practice is to consider drying as a step out, just like storing the rope.
The major risk is the loss of information and isolation, not “being wet”.
The moisture that accumulates damages more than a short rain: organize the bag to dry quickly.
By the sea, corrosion and salt require discipline in terms of storage and rinsing.
Once these risks are understood, you can finally assess what a “waterproof bag” is worth in the field, beyond the word printed on the label.
Understanding what you’re buying: waterproof, breathable, and leakproof
Waterproof vs waterproof: the operational difference in climbing
In the mind, “impermeable” and “waterproof” are often synonymous. On a wet cliff, not so much. A textile can repel water (repellence), slow down infiltration (impermeability), or prevent water from entering even under pressure (sealing). This blurring of terminology explains many disappointments.
A waterproof bag is mainly used to delay the onset of the problem: it keeps the outer fabric drier, limits water absorption, and prevents the bag from getting soaked immediately. This is useful when you’re walking in light rain, when you’re crossing a wet area of trees, or when the bag gets splashed with water. But as soon as the water seeps in for a long time, it looks for the weak points: seams, closures, areas of friction.
A “tight” bag, on the other hand, aims for a barrier logic. But that barrier must be consistent: fabric, assembly, closure, and interface with your back. If the back is a sponge (a foam that drinks), you are carrying a reservoir against the contents. If the straps get soaked, you are bringing water into the inside through prolonged contact.
In practice, don’t ask “is the fabric waterproof?”. Ask yourself “where can water enter, and how long before it touches what matters?”. It is this timing that determines whether you just have a wet bag, or a bag that ruins your outing.
IPX indices: useful, but be aware of the limits in real-world situations
The protection ratings are reassuring because they seem scientific. They are useful, provided that they are read as test conditions, not as a universal promise. A device advertised as IPX7 is associated with immersion up to 1 meter for 30 minutes in defined conditions, according to an information document produced by Garmin.
Two points count for the climb. First, IPX describes a level of protection for an object, not a bag. Second, immersion and splashing are not the same constraint: splashing is water that seeks out the seams and junctions, for a long time, in a fine form. It is often more vicious than a “slip in the water” that you would avoid anyway.
If you need to remember a rule: a high index can limit the wear on a device, but it does not replace a proper organization of your gear. It is your organization that prevents you from having to “test” the limits. And it is also a matter of durability: the less a product undergoes moisture cycles, the better it ages.
Efficient closures: loops, zippers, and protective snap fasteners
The closure is where the water gains, because that’s where you manipulate it. The winding closure works well when it is rolled and compressed properly. It also tolerates variations in volume better. It imposes discipline: you must roll it properly, and avoid getting a fabric caught in it.
Drawstrings provide passive protection against leakage. They do not make a bag waterproof, but they reduce the direct exposure of the openings. Zipper closures can be effective if they are protected, oriented intelligently, and if they do not twist. In high traffic, when the bag is being carried, dragged, or stuck, twisting is common. The weak point is not the closure “in itself”. It is the use.
Simple rule of thumb: if you have to open your bag in a hurry, opt for an opening that limits the exposed surface. The less opening you have to the outside, the more control you have.
Underestimated water entry points: seams, back, straps
Most of the infiltration comes from details. The seams are perforations. Without treatment, they let water in. With treatment, they hold better, but they age: creases, UV, abrasion, salt. The back and the foams, on the other hand, store water. You can have a bag that “doesn’t leak” and yet a wet contents, simply because the moisture transfers through prolonged contact.
The shoulder straps play a discreet role: they catch the water, then relay it inwards when they stick to an opening, or when you put the bag down and they fall into it. In the mountains, you often put the bag in any way you like. If you want to stay dry, you need to ritualize the gesture: shoulder straps up, opening protected, chosen placement area.
Three recommended levels of protection. Further reading: waterproof climbing backpack. Also read: waterproof climbing backpack.
- Simple level: waterproof fabric + internal organization (dedicated pocket for electronics).
- Robust level: External protection against rain + sealed internal compartments for insulation.
- Critical level: Complete internal barrier (sealing compartment or inner bag) + opening discipline in the wall.
“Depliant” buys time; “Sealing” creates a barrier: these are not the same uses.
An IPX7 test (1 meter, 30 minutes) describes a testing condition, not a day of splashing on a bag.
The most common water inputs are mechanical: seams, foams, straps, manipulations.
Do you want to apply this method? Make a list of your “non-negotiable dry content”, then build your organization around it.
Once the concepts are clarified, the most effective approach is not to look for the perfect bag, but to combine simple protections that complement each other.
Protect your wet climbing bag with a layering strategy
External rain cover: quick, but rarely sufficient
The outer shell has an obvious advantage: it quickly gets on, it protects the main fabric, and it limits saturation. When approaching, it is often the best “first response” when the rain arrives. And it is useful even with a protective bag, because it keeps your bag lighter and easier to carry.
Its limitations are mechanical. In the canyon, you put the bag down, you drag it, you hang it up. The cover can move, let the water pass through at the bottom, tear. It protects better against vertical rain than from lateral runoff or wet ground. It is also troublesome to put back when the wind picks up.
Good use is therefore tactical: the cover helps you get through an episode, not to guarantee a dry interior if you open it often. Think of “saving time”, not “making it waterproof”. And keep in mind durability: a thin cover sacrificed on the rock is normal. What matters is what it avoided inside.
Waterproof inner bags: the modular organization that saves the exit
Internal protection is more reliable because it follows your storage logic. You can isolate the critical elements: warm layer, electronics, food, emergency kit. You can also manage humidity by separating the dry from the wet. It’s a less “spectacular” approach than a bag advertised as waterproof, but more stable in the field.
The highlight is controlled opening: you don’t have to expose the entire bag to the air. You open an internal compartment, take out just one item, and close it again. This reduces errors and speeds up handling. On the whole, this gain in fluidity is a gain in safety.
The simplest and often most cost-effective version is to use different-sized inner waterproof bags, rather than a large single bag where everything gets mixed up. You also avoid the “messy” effect that eventually forces the closures and causes the bag to deform.
Minimalist alternative: The thick trash bags, used as an inner lining, can be useful and effectively protect if you close them properly and avoid any holes. It’s not elegant, but in fact this is sometimes what makes the difference between “everything wet” and “the strictly necessary dry”.
Double barrier: the most reliable strategy for fast thunderstorms
In escalation, the common mistake is to choose only one barrier and believe in it. Only one barrier will always be tested: sewing that wears out, a poorly made closure, a bag placed in a puddle, opening at the wrong time. The double barrier drastically reduces the risk, because it accepts an error without immediately punishing you.
Specifically: external protection (a cover or protective fabric) to limit saturation, and an internal barrier for what shouldn’t absorb water. This strategy is particularly relevant for the big wall, mountaineering, and all those outings where “returning to the car” isn’t a quick option.
It also improves durability. You reduce the moisture cycles on the foams, you limit odors, you dry faster. A well-managed bag ages better than a poorly managed “high-end” bag.
Flux: Stable and short forecast → prioritize simplicity (deodorant + internal pocket).
Uncertain forecast or exposed relief → add a quick external protection.
High mountain trail, mountaineering, camping → mandatory double barrier on insulation and electronics.
Seaside or permanently wet rock → strictly separate metal, dry textile, wet textile, and provide for drying on return.
| Option | What it really protects | Typical limit in climbing | For whom |
|---|---|---|---|
| Waterproof fabric only | Slows down saturation, protects against splashes | Prolonged leakage, repeated openings | Couenne, stable weather, short approach |
| External protection | Keep the bag lighter, limit the water on the fabric | Cracks, infiltration from below, wind | Approaches, mixed exits, intermittent rain |
| Sealed internal compartments | Secures the insulation, electronics and food | Risk if poorly closed or perforated | Long distances, long exits, changing weather |
| Double barrier | It tolerates error, even protects with a wall manipulator | A little more volume requires a routine. | Climbing, camping, rapid storms |
External protection buys time; internal protection protects the “vital”.
The double barrier is the best protection against manipulation errors and short storms.
Your organization is often worth more than a piece of fabric: it reduces openings and omissions.
Once your strategy is set, it remains to be adjusted to your climbing style, because you don’t wear the same thing in canyoning, in big-wall climbing, or in mountaineering.
Choose your level of waterproofing according to your practice
Falaise in a day: effective minimalism, without illusion
In a canoe, you can often simplify things. You are close to the car, you can shorten the length, you have less vital equipment. The right compromise is to protect what cannot withstand water (electronics, warm layer) and accept that the rest may end up wet.
The key is access: you often open the bag, look for a pair of gloves, take out a bar, and then pick up another down jacket at the insurance office. An ultra-protective bag that is difficult to open can make you want to leave it open. And an open bag nullifies all the promises.
Your goal is therefore to stay organized. Prepare a storage system that prevents you from having to dig through your belongings. A simple, well-organized bag can be more “impermeable” in fact than a bag advertised as protective but poorly managed.
High-speed route: autonomy, dry redundancy, and handling under pressure
In high altitude, you don’t have the same leeway. You sometimes climb with the pack, you get it stuck, you put it on wet rocks. You open in relay, sometimes under a fine rain that lasts. Here, impermeability becomes a question of continuity: continuing to climb while keeping a dry layer, and having something to orient yourself and descend with.
Useful redundancy isn’t “having two jackets”. It’s having a barrier that doesn’t depend on a single action. The poorly rolled closure arrives. The poorly closed inner pocket arrives. The question is: does your system tolerate an error without ruining the whole thing?
Another point: the durability of the materials. Abrasion is more common in high-use situations. A stronger fabric, even a bit heavier, can be more cost-effective in the long run than an ultra-fine fabric, especially if you climb frequently. Snap Climbing was born in Chamonix with this culture: equipment that follows modern practice but accepts real rock, not “catalog” rock.
Mountaineering: melted snow, long carrying, and humidity settling in
In mountaineering, water is not just rain. It is melted snow, contact with wet surfaces, and cold phases that freeze and then release the moisture. You wear longer, you sweat more, and your pack stays stuck to your back. Managing moisture becomes a management of balance: protecting against external water, but also avoiding trapping internal moisture.
The thing that changes everything is routine: what you put in the wet must not touch what is to remain dry. Internal separation is not “nice”; it is structural. And the longer the effort, the more a small mistake pays off.
For hardware stores, the subject also relates to corrosion: moisture + salt (or pollution) + closed storage accelerate degradation, which reminds us of the importance of aerating and drying the items after use.
From the room to the outside: priority to the fragile, not to volume
When moving from indoors to outdoors, we often overestimate the necessary volume and underestimate the fragility of certain items. You can have an enormous bag and everything get wet, or a compact bag and keep the vital items dry. The priority is therefore given to fragile items: a map, a phone, a teddy bear, a small repair kit, and food.
We also see some room habits that become risky outside: placing bags on the floor without looking, leaving them open, mixing textile and metal. Outside, these habits quickly pay off. The best investment is an organization that forces you to close the door, and gives you a clear place for each item.
Bivouac: protect isolation, clothing, food, and accept “manageable” humidity”
If you’re leaving for a night, the backpack becomes a home. What must remain dry becomes non-negotiable: insulation, change of clothes, food. Here, impermeability is not “an extra,” it’s a prerequisite for recovery. A wet bivouac costs you the next day, even if you “stay” overnight.
You won’t win against humidity by looking for a miracle product. You win by controlling the exchanges: separating, closing, ventilating, drying as soon as possible. It’s field hygiene. And it’s also what prolongs the life of your bag: fewer odors, fewer mold, less fabric that’s soaked to the bone.
In the canyon, protect the fragile; in high-altitude travel and mountaineering, protect the vital with redundancy.
The longer the exhibition lasts, the more decisive the internal organization becomes.
Salt and prolonged moisture accelerate the degradation: drying and aeration are part of the kit.
Once your practice is established, the remaining questions are often very concrete. Here is a short, actionable FAQ, designed for the real life of a rock climber.
FAQ: Waterproof climbing bag, clear answers
To put a point often misunderstood into context: IPX7 refers to immersion up to 1 meter for 30 minutes in a test environment, which helps to interpret certain claims without confusing them with a day of climbing in light rain.
Is a “degradant” bag sufficient for long-distance travel?
No, not as a single strategy. A waterproof bag slows down the water, but does not secure the insulation and electronics if you open the door frequently. On a long journey, you need an internal barrier for what should not get wet; otherwise, even the slightest infiltration becomes a loss of heat and information.
Rain cover or waterproof internal compartments: which should be prioritised?
Prioritize the interior if you have to choose. A liner limits the saturation but does not protect in the event of a bag being placed on the ground, repeatedly opened, or spilling from the bottom. Sealing internal compartments protect the essentials even if the outer bag is wet, and they help organize your belongings.
Are the waterproof bags completely reliable?
They are reliable if you close them without haste and if you control their condition. Failures mostly come from routine: poorly rolled closure, sand in the seal, micro-perforation. Treat them like testing equipment, just like a carabiner: simple, quick, regular.
How much internal volume should be provided for a top and a down jacket?
Plan for a volume that will accommodate a compressed down jacket without forcing it, plus some room for the stuffie and electronics. If you have to “crush” to close, you increase the risk of error and waste time manipulating it. The right reference point is a closure that is made calmly, even with cold hands.
How to limit condensation and internal moisture in the bag?
Ventilate immediately upon return, remove anything that is damp, and avoid storing a closed bag in a trunk. A relative humidity of around 60 is % enough to make visible mold growth on some surfaces possible, giving an idea of the risk when air remains trapped.
The deflector alone is too fragile; an internal barrier is needed.
Reliability depends as much on your closing routine as on the product itself.
The internal humidity is managed upon return: ventilation and drying prolong the life of the bag.
After the questions, there remains the final decision: in what cases is sealing mandatory, and in which cases it is primarily a matter of comfort.
Free movement for an ultimate escalation…”


Deciding whether it is necessary: arbitrating without making mistakes
When tightness becomes non-negotiable
You don’t need an ultra-protective pack every time you go out. However, you need “no-discussion” protection as soon as your outing combines three factors: duration, exposure, and dependence on insulating textiles or electronics. This is typically the case on long routes, in mountaineering, in bivouac, and during long approaches where you cannot easily turn back.
Add a fourth factor: the probability of being caught off guard. In a season where wet episodes are frequent, you are not surprised “once”. You are surprised when you have not planned for a margin. And that is where redundancy pays off.
Simple rule: if your outing turns into a bad plan when your down jacket gets wet, you must protect it as a safety measure, not as just another piece of clothing.
When internal protection is sufficient
Conversely, if you climb in a ravine near the car, with stable weather conditions and no sensitive equipment, targeted internal protection may be sufficient. The point is not to have “everything waterproof”; the point is to waterproof what would otherwise cause you problems. The rest can be managed through drying, rotation, and discipline in storage.
It is also the most sustainable choice in terms of use: you keep a more versatile bag, you don’t buy a “forever” promise that you won’t use, and you maintain a reusable organization from one outing to the next, including on hikes.
Compromise in terms of weight, volume, and budget: realistic arbitration
The more you aim for a total barrier, the more you pay in rigidity, price, and sometimes in carrying comfort. The mistake is to optimize everything at the same time. In climbing, you want stable carrying, easy access, and sufficient protection. Your budget should follow your frequency of outings, not a momentary whim.
Also think about durability: a fabric that is more robust, even if it’s a bit less “technical” on paper, can better withstand rocks, rubbing, and repeated wear. Real wear counts more than rhetoric.
Customary rituals: closing, storage, maintenance
The best bags are beaten by bad routines. Conversely, a simple bag can become very reliable if you apply rituals. Always close the same closure in the same order. Always store electronics in the same place. Always separate the dry and wet items. When returning, open, take out, dry, and then store in a dry place.
Two simple actions make an immediate difference: never placing the bag open-side up, and never storing wet metal against textile. These are small details, but they reduce wear and unpleasant surprises.
| Common error | Consequence | Immediate correction |
|---|---|---|
| Opening the bag in fine rain to “just get something” | Diffuse humidity over all the internal textile | Create a dedicated pocket that is accessible without exposing the interior |
| Mixing dry clothes and wet textiles | Loss of insulation, odors, impossible drying | Separation into compartments: vital dry/tolerated wet |
| Place the bag in the wet grass or a puddle | Bottom infiltration, stuffed sponges | Choosing a placement area, straps facing up |
| Store the bag closed when returning | Trapped humidity, risk of mold formation as early as 60 % dH on certain surfaces | Open, empty, dry, air before storing |
| Leaving the hardware store wet in a saline atmosphere | Accelerated aging, pricks, springs less fluid | Rinse, dry, isolate the metal from the textile |
Sealing is mandatory when the loss of insulation or information would put you in trouble.
Targeted internal protection often suffices in a pinch if you are organized.
Sustainability depends as much on maintenance as on the fabric: drying and storage are more cost-effective in the long run.
Last useful tip: if you climb in France, the periods of unstable weather return, and September is often a month when you get caught up in the alternating sun and rain. As François said in an old field article, you only get caught off guard by the first rain of the season; afterwards, you adapt.
You don’t need an impermeable bag “by principle”. You need a bag that is consistent with your practice, and an organization that protects the vital without slowing you down. If your outing depends on a warm layer and a working phone, put an internal barrier in place and assume double protection. If you are in the backcountry near the car, focus on the essentials and invest in routine: closing, separating, drying. You will gain comfort, safety, and durability of equipment, and you will soon be more at ease in the face of unexpected showers.
 Français
 English (UK)


