

Treatment of escalating injuries: the clear and actionable guide
You often climb: therefore you have a high chance of encountering a «typical» pain (finger, elbow, shoulder) earlier than expected. In a recent study, a large majority of recreational climbers report having already suffered at least one injury. Scientific source (mountaineer survey)
This practical guide gives you a simple method: what to do immediately, how to sort out the urgent from the manageable, and how to recover without relapse. You will also find a realistic toolkit, common mistakes, and concrete guidelines to help you decide.
To choose your tapes, protective covers and everyday accessories, consult the selection Snap climbing accessories.
The essentials in 30 seconds
1) Stop the aggravating gesture: rest, safety measures, and then cooling without burning the skin.
2) Evaluate quickly: deformation, cracking, loss of grip strength and nocturnal pain change the way to proceed.
3) Fingers/Skin: Clean, protect, then only remove if the lens is clear (stabilize, unload, guide).
4) Reprise: validate pain, mobility, strength and swelling before increasing volume, intensity and repetitions.
Before getting into the immediate actions, lay a foundation: preparation saves time on the day it happens.
Prepare your care: first aid kit, protective equipment and warning signs
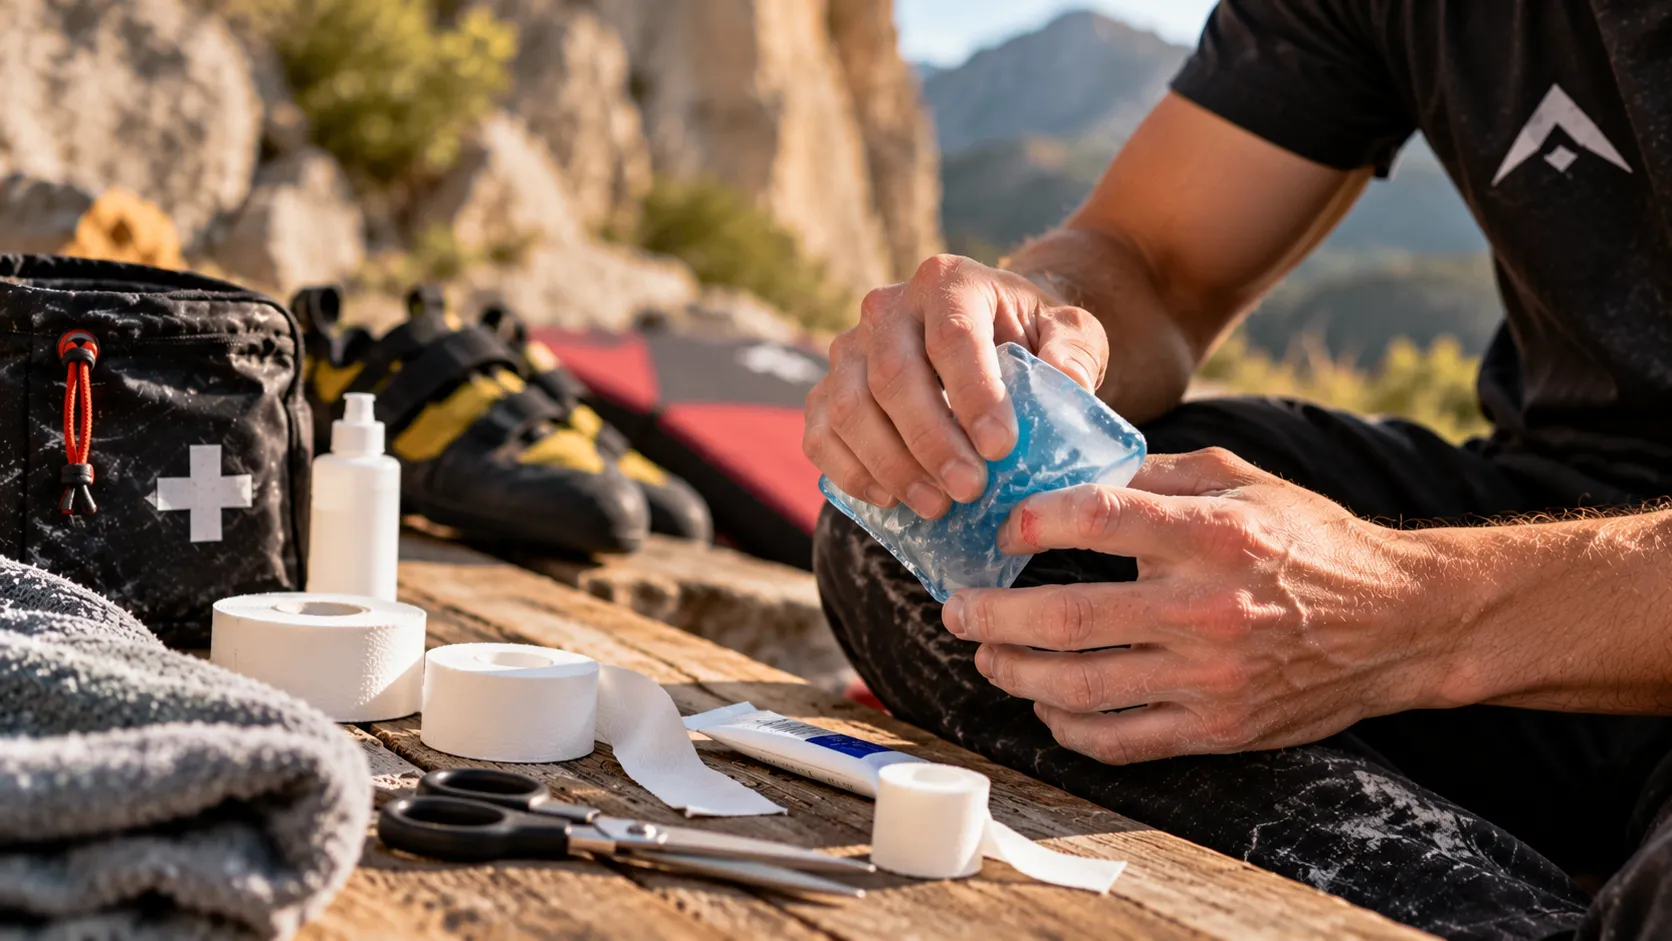
Useful care tools and protections
An effective first aid kit is not a complete pharmacy. It is the minimum equipment that allows you to clean, protect, compress slightly, and immobilize if necessary, without improvising with construction tape. In the rooms, many practitioners rely on the reception desk. Outdoors, you are your own safety net.
Aim for three families of goals: hygiene (cleaning without aggression), protection (skin, joints), and comfort (cold, light compression). The most useful thing is what prevents the small injury from becoming a long-term problem: a poorly protected crack, a finger overused, an arm that lets itself be teased.
| Element | What is the point of this? | Ground use council |
|---|---|---|
| Physiological serum | Rinse off any abrasion, remove any magnesium and grains | First rinse, then dry: the skin heals better when clean than when «powdered» |
| Bandages + strips | Protecting a wound, limiting friction | Choose a format that covers without bending on the joint |
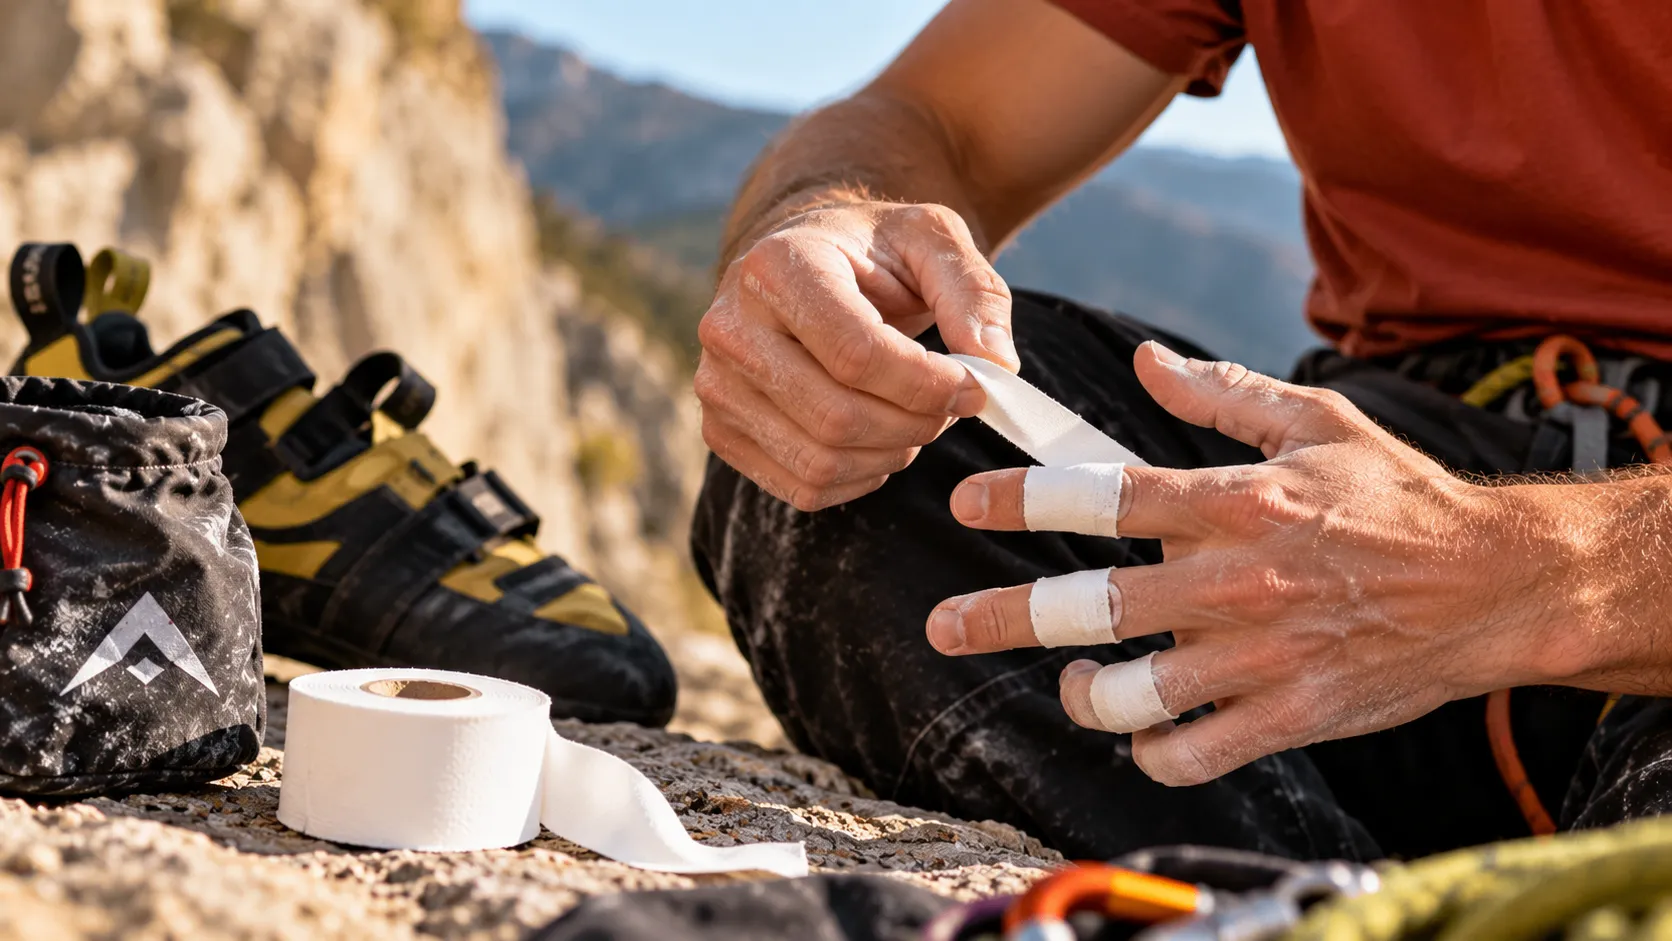
| Sports tape | Targeted support for fingers and joints, skin protection | Cut cleanly, round the corners: the strap holds better on the sweat |
| Cold pocket | Reduce pain and perceived swelling | Interlace a textile, never in direct contact with the skin |
| Mini scissors + compresses | Clean cut, breathable protection | A clean cut avoids the «hard spots» that trigger pain |
Keep a short but comprehensive kit: cleaning, protecting, supporting.
The right strap is not «tighter»: it is more precise, and adapted to your gesture.
Consider recovery: skin and tendons recover differently.
Estimated time depending on the severity and level of difficulty according to the affected area
With escalation, the time to recover is not just a question of pain. It depends mainly on the affected structure (skin, muscles, tendon, pulley, joint) and your ability to adapt your activities. A abrasion can be bothersome from the first day of training. Tendonopathy may seem «bearable» but can settle in if you pile on the training.
To guide you without trapping you with rigid durations, think in terms of levels: (1) localized discomfort that does not alter strength, (2) pain that alters your movement, (3) pain that prevents you from using a «normal» grip, (4) loss of net strength or pain at rest. The higher you climb, the more precise management is required.
In terms of difficulty, the fingers dominate: small picks, arching, inversions, and ligatures mount very quickly in terms of strain. The elbow follows as soon as you compensate by pure traction. The shoulder becomes critical when you force through lock-ups and dynamic movements.
Do not judge the severity by the pain alone: look at the loss of function.
The fingers and the shoulder require fine adjustments; otherwise the load increases without you feeling it.
A discomfort that changes your movement is already a sign of action.
Checklist: Immediate warning signs
When an alert signal is present, your goal changes: you no longer seek to «finish the session»; you seek to avoid exacerbating the situation.
- Visible deformation, rapid swelling, hematoma that appears quickly.
- Cracking or a sensation of «clicking», then loss of control.
- Brutal loss of strength (pinching, extension, rotation) or involuntary release.
- Rest pain that increases, especially at night.
- Numbness, persistent tingling, abnormal color of the finger or hand.
- Inability to use the joint in the usual range of motion.
A deformation, a crack or a loss of net strength immediately change the strategy.
The nerve signs (lasting tingling) do not «tighten up»: they are evaluated.
The good thing to do is to stop before lasting irritation occurs.
Now that your base is ready, the most profitable move remains the same: cutting off the source.
Stop the aggravating mechanism: the gestures that save your season
Resting the area and ensuring its safety
When pain occurs, the first minute often determines the rest of the day. Your priority is to stop the movement that is causing the strain on the area, and then to secure it. In a block, descend properly, without jumping if a ankle or knee is troubling you. On the way down, prioritize a controlled descent. Then, rest the area: do not try to «just once» on the move that triggered the strain.
Relative rest means: you keep the movement that does not cause pain and eliminate the one that triggers it. Simple example: if the arch is heating up a finger, move with a wide grip and eliminate dynamic movements. If the shoulder is in conflict, avoid locking positions and large internal rotation amplitudes.
This rest is also mental. Many climbers continue in an inert way, especially during group sessions. Yet, continuing a few ascents can turn irritation into lasting inflammation, costing you weeks of effort.
Stop the precise action that triggers it: you win more than you lose.
Relative rest = remove the irritating load, not immobilize the entire limb.
The collective is pushing for «completion»: keep your decision.
Cool without burning or numbness
Cold is especially useful for soothing pain and the sensation of pulsation after a shock or acute overload. The simple rule: protect the skin, limit the duration, and allow the area to «breathe» between applications. The first aid recommendations of the American Heart Association and the American Red Cross outline the application of cold and emphasize the absence of direct contact with the skin. First aid recommendations (cold)
In practice, climber: a fine textile between the pocket and the skin, then regular monitoring of sensitivity. If the area becomes white, insensitive or painful «from the cold», you stop. The goal is not to anesthetize and leave. The goal is to bring the alarm down.
On the fingers, the cold can make gripping difficult to feel. Use it instead after securing and evaluating it, not as a «reset» button before a final run.
The cold is calming, but it doesn’t fix things: use it to bring down the pain, not to keep going harder.
Never any cold directly on the skin, especially at the fingertips.
If the sensitivity drops, you cut it off.
Decision flow: continue or stop
Flux: sharp pain → immediate stop → check for deformation / cracking / loss of strength → if yes: stop + protection → if no: gentle mobility test without pain → if the pain changes movement: stop the specific load → otherwise: very light resumption of technique, without intensity, monitoring the evolution after the session.
This flow avoids the trap of «it happens too quickly». When you climb, the body warms up quickly, the perception changes, and you end up straining an irritated tendon. The next day, you pay the price.
Your decision is made based on the function, not on the ego.
If your movement changes, you are already in compensation.
Also watch for the after-session: that’s often when the signal becomes clear.
Common mistakes after a severe pain
The first mistake is the repeated test. You repeat the same movement «just to see», then you jerk it off in a hurry, and then you do it again. This loop increases the cumulative load on an already irritated structure.
The second mistake is using a strap as an alibi. A strap can guide or relieve strain, but it should not mask a loss of strength or instability. Otherwise, you are pushing back the diagnosis and complicating the recovery process.
The third mistake is to change zones without changing the load. Example: you leave the bands for the plates, but you put the same intensity, the same repetitions, the same muscle fatigue. The tissue has no time to return to its original position.
Do not «re-test» in an emotional state: test only once, calmly, then decide.
A strap is not permission to force.
Reducing intake without reducing intensity is not enough.
Once the mechanism has been stopped, you need a quick and reliable mini-evaluation.
Quickly assess the severity: sort out the irritation from the injury
Distinguishing muscular and tendinous pain
Muscle pain often follows a simple logic: it appears after an effort, is accompanied by stiffness, and varies with the warm-up. Muscle pain burns, then recovers if you dose it correctly. Tendon pain, on the other hand, is more deceptive. It can be very localized, «spot» on a path, and wake up cold or after the session.
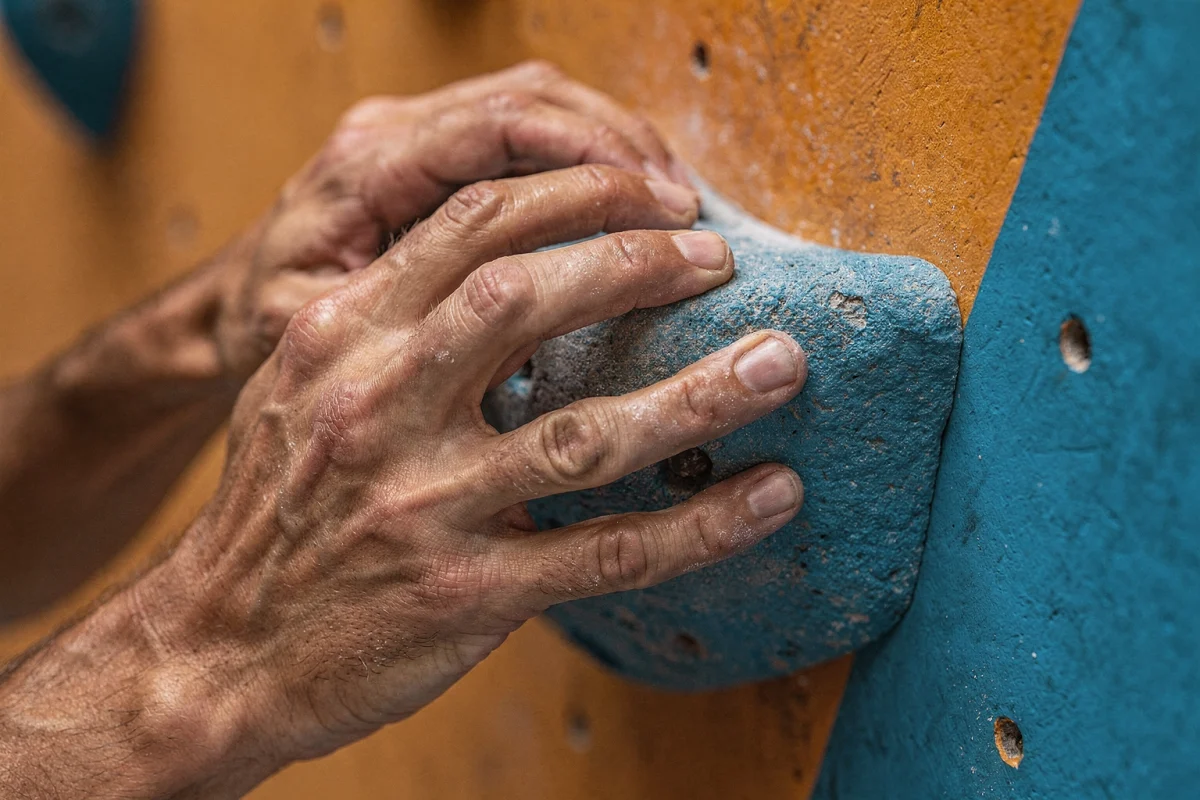
With progression, many finger pains resemble fatigue, whereas the flexor tendon or pulley is irritated. If you feel specific pain in an articulation, or a pain that recurs systematically with certain movements, treat it as a sign of overload, not as a simple lack of form.
Your goal is to identify the dominant structure: skin (surface), articulation (capsule), tendon (pathway), or muscle (diffuse). This is what will shape your advice and your recovery plan.
Muscles: often diffuse and linked to exertion; tendons: often localized and recurrent.
A «point» pain on a specific movement deserves immediate adjustment.
Identify the structure before choosing a strap, rest, or reinforcement.
Testing mobility without causing pain
Test gently, on a partial amplitude, then increase if everything remains neutral. On the fingers: open and close without load, then make a slight flexion. On the shoulder: elevation, gentle external rotation, and internal rotation without forcing. On the elbow: flexion-extension then pronation-supination.
The useful test is the one that does not cause any severe pain. If the pain appears in a «stab-like» manner, you stop the test. You have nothing to prove. You are looking for information: is it stable, is it controllable, is it modifiable by a reduction in load.
If you have a traction machine in the gym, do not use it as an immediate test after a shoulder or elbow pain. The traction loads do not work when the collarbone or tendons of the forearm are irritated.
Test slowly, in partial amplitude, without load at the beginning.
A test that triggers severe pain is a bad test.
Avoid «heavy» tests in the hot state, especially traction tests.
Quick check in one minute
Express routine: Have her sit down, in peace.
- Locate: a specific point or a diffuse area?
- Function: Can you open/close, lift/lower, turn without severe pain?
- Strength: light grip, very light traction, gentle wall push. Compare right/left.
- Signs: swelling that progresses, local heat, tingling, instability.
This check is not a diagnosis. It is a filter. It helps you decide: complete rest, relative rest, or a slight technical recovery by avoiding the irritating gesture.
Keep the check short, otherwise you'll skip it.
Always compare to the healthy side to be objective.
A clear decision is better than a «gray» meeting.
Warning sign: deformation and cracking
Visible deformation, instability, or a sharp crack followed by a loss of strength should trigger you to enter protection mode. On the fingers, a «pop» may correspond to a pulley injury. On the shoulder, a crack associated with pain and loss of control is another scenario, unlike a simple painless noise.
Your behavior: stop, cool down if necessary, apply light support, and have a professional assess the situation if the deficit persists. The information collected (triggering movement, specific area, evolution after rest) speeds up the treatment.
Deformation + loss of strength: you protect, you no longer «test».
A painless noise is not the same signal as a noise with a deficit.
Note the trigger movement: that’s often the key.
Once the assessment is made, we attack the most exposed area by ascending: the hand.
Treating the hands and fingers: skin, strapping and overwork
Skin care: abrasions and cracks
The skin is your interface. A poorly managed abrasion changes your grip, changes your wrist position, and eventually transfers the load to the joints. First clean, dry, then protect with a dressing that does not fold over the joint crease.
For cracks, look for the cause: magnesium that dries out, aggressive washing, or repeated rubbing on a type of grip. The goal is twofold: to reduce pain and prevent the crack from opening under load. A protection that «cuts» when you bend your finger is counterproductive.
Simple tip: adjust the length of the bandage to your range of motion. If you lose flexion, you compensate elsewhere. And if you compensate elsewhere, you increase your chances of irritating a tendon.
Clean, dry skin, then protected: that is the order of things.
Protection that interferes with flexion creates compensations.
Treat the cause (drought, friction), not just the wound.
Strapping: pulleys and finger joints
A useful strap has an explicit purpose: to limit an irritating range of motion, guide an articulation, or remind you not to charge a socket. It should not «tighten to reassure.» It should stabilize without cutting off circulation or making the finger cold.
Regarding the pulleys, the loads can be very high on some attachments. A review on the subject reminds that pulley A2 can be exposed to significant forces, and that the loads increase during a shock (the foot that zips). Scientific source (tapes and pulleys)
In practice, two mistakes occur: the strap is too low (it slides and creates a point of friction) and the strap is too rigid (it locks, then you force more on the other fingers). If you strap, reduce the intensity and avoid strict arching. A strap without load reduction is rarely beneficial.
Straps = clear objective (to guide, limit, remind), not psychological bandages.
Decrease the intensity while you are pulling.
On suspect pulleys, avoid the archer and dynamic movements.
Managing tendinitis of the flexors and overexertion
Overexertion in flachers often comes from a combination of factors: too much volume, too many small shots, too little recovery, and sometimes cramps that make you «tighten up» instead of positioning yourself properly. The tendon does not like spikes or repeated shots that cause constant pain.
Your strategy: reduce the irritating load, then gradually reintroduce it. Start with comfortable grips, using proper technique, without locking down. Then, increase the difficulty by one parameter at a time: volume or intensity, not both.
Add targeted strengthening when daily pain is neutral: controlled light stretches, open holds, and stops as soon as the pain increases. Keep a simple logic: the tendon adapts, but it needs clear signals, not a fog of effort.
Cut down on peak loads: this is often where the tendon becomes irritated.
Reintroduce only one parameter at a time (volume or intensity).
Strengthen only on neutral ground on a daily basis.
Warning: loss of grip in the pliers
The grip is a good indicator. If you suddenly lose grip strength, especially with very localized pain, you should suspect a more serious problem than just fatigue. In this case, the right choice is to protect and assess, rather than compensate by pulling harder with the shoulder.
Also note whether the pain occurs with a specific type of grip (fist, arching, two-fingered). This precision will help you adapt the grip and choose a suitable strap. The clearer your description is, the more effective the help you receive will be.
A net loss of strength is not simply a sign of «rigidity».
Don't compensate by shooting harder: you are moving the risk.
Describe the trigger grip and movement: it’s a useful shortcut.
After the fingers, the shoulder-elbow joint is the one that causes the most pain if you let bad compensations take hold.
Treating the elbow and shoulder: calming, adapting, reconstructing
Calming epicondylitis and forearm tension
The elbow rarely hurts «by chance.» It hurts because the forearm compensates: constant tightening, frozen wrist, and repeated traction. The first lever is technical: release between movements, place your feet, and avoid long sets on holds that force you to tighten.
Then adapt your sessions: eliminate the movements that trigger them (aggressive undercutting, tight arching, repeated locks). Keep what is neutral: volume, free throws, placement. If you are doing strengthening, reduce the load and increase control. The goal is to give the tendon a controlled effort, not to prove your level.
During the warm-up, add a gradual activation of the extensor muscles, and maintain a recovery between sets. This is often more cost-effective than increasing the intensity and «tightening up» even more.
The elbow often pays a permanent tightening: release and place it before pulling.
Cut out trigger moves; keep the climb neutral and technical.
Reinforcement = control, not maximum load.
Relieve the rotation joint and shoulder joint
An upper arm that «clenches» when raised or that becomes irritated after dynamic movements requires two things: reducing the irritation and restoring stability. In the short term, reduce movements that combine high amplitude and traction. Prefer movements where the shoulder blade can move freely.
Then, strengthen the stability: controlled external rotation, lowering the shoulder blade, and light pushes if they are neutral. Climbers pull a lot, push a little. Rebalancing often helps reduce pain on the trail, especially in modern climbing.
If you hear noises but the function is good and painless, it is not the same situation as a noise with loss of power. Keep the rule: you rely on the function, not on the sound.
Reduce dynamic movements and large ranges of motion in traction at the beginning.
Work on stabilizing and controlling the shoulder blade to secure the hairstyle.
Noise alone: monitor; noise + deficit: adjust strongly.
Adjusting the amplitudes: pulling versus pushing
When an area becomes irritated, you must choose: either you completely eliminate it, or you adapt. The most effective adaptation is often amplitude. You can continue to climb without relapses if you reduce the «extreme» positions and maintain a low intensity.
For the shoulder, reduce the high bar and movements where the elbow goes far behind. For the elbow, avoid undercuts where the wrist breaks. Add light pushing (inclined presses, wraps) if it’s neutral. This alternating pull/push technique prevents the entire session from being reduced to just one muscle chain being saturated.
Keep one rule: if you have to cheat technically, you are too loaded. Go back to neutral, then progress.
The amplitude is a powerful slider, often underutilized.
Reintroduce neutral pushing to balance the constraints.
If the technique deteriorates, the load is too high.
Warning: persistent nocturnal pain
Pain that wakes you up, that settles in at night, or that increases during rest deserves more attention. As it escalates, it sometimes becomes commonplace, because «it’s okay when I warm up.» However, nocturnal pain is often a sign that the area can no longer return to its baseline state between stimuli.
In that case, reduce the load frankly, reassess your volume, and seek advice if the function does not progress. Also consider what happens outside of the climb: work on the computer, carrying a backpack, sleep, stress—everything can amplify irritation.
Nighttime pain is not a minor issue: it often indicates persistent irritation.
Lower the load clearly, not «just a little». Then observe.
Also look at everyday gestures: they count.
When the pain is calmed, the focus becomes recovery. That is where most relapses arise.
Re-starting the climb without relapses: criteria, progression, and prevention
Return criteria: neutral pain on a daily basis
The best criterion is not «I can climb.» It is «my daily routine is neutral.» If you have trouble opening a door, holding a bag, or typing on the keyboard, climbing will almost always be restored. Look for a stable base: low or absent pain during the day, uninterrupted sleep, overall symmetrical mobility.
Then validate with simple gestures: very light suspension, open grip, slow movements. If the symptom increases afterwards, it means the load was too high. This feedback is valuable: it guides you without lying to you.
Keep a logical approach: you resume when you can charge, recover, and then recharge. Not when you can «survive» a session.
Neutral daily news before a serious resumption: this is your most reliable filter.
Test lightly, then observe: the post-charge response is a key indicator.
Reprise = charge + recovery, not performance.
Progress of charges: volume, intensity, seizures
Progress as a forward player builds a line: one parameter at a time. Volume (duration, number of attempts) is the first. Intensity (difficulty, engaged movements) comes next. Small shots and restrictive positions come last.
Simple example: if you come back from a sensitive finger, you climb easier on clear pitches with fluid movement. Then add a little more volume. Only after that, increase the intensity. If you do the opposite, you get short sessions that are very aggressive and that only serve to trigger irritation.
Also keep a technical margin: if you tighten to compensate, you are too high. The right benchmark is fluidity. This is one of the most effective best practices in the long term.
First turn up the volume, then the intensity, and only then the demanding takes.
Maintain a technical margin: fluidity before strength.
If you compensate, you go back down.
Targeted strengthening: fingers, shoulder, torso
Strengthening is not punishment. It is a contract: you give the body a measured stress, it makes you more tolerant. For the fingers: controlled suspensions, open grips, slow progression. For the shoulder: stability of the shoulder blade, controlled rotations, and a little push if neutral. For the trunk: wrapping, anti-rotation, and control of the pelvis, because an incorrect placement always ends up overloading the upper part.
The trap is to load too early «because it’s a reset, not a climb». The fabric doesn’t make that distinction. It sees a constraint. Dose, observe, then increase.
If you are being monitored, share your specific feedback: pain during, after, and the day after. These are useful information that speeds up the adjustment process.
Strengthening means taking a measured approach: progress is worth more than a one-off feat.
The torso and shoulder blades protect your fingers by improving positioning.
Measure the aftermath: that’s where the burden is judged.
Preventing recidivism: warming up and recovery
Prevention is rarely spectacular. It is repeatable. A progressive warm-up (mobility, activation, then easy climbing) prepares your joints and tendons to take the strain. Many climbers know this, but skip it out of impatience. Yet it is one of the most cost-effective tricks, especially when you are recovering from an injury.
Recovery takes place off the court: sleep, hydration, and alternating sessions. Vary the styles, vary the shots, and avoid weeks where you only do «hard» work in a short period of time. In the long run, what protects is regularity and the absence of peaks.
Finally, keep a record. A simple notebook is enough: perceived pain, sensitive areas, type of session. You will see your patterns before the relapse.
Progressive warming-up: simple, repeatable, very protective.
Recovery is part of the training, not a bonus.
Track your sessions: you’ll spot your peaks before they catch up with you.
You have followed the steps: the next step is to objectively validate them and then decide on the next steps.
Validate your progress: indicators, simple tests and immediate actions
Indicators to monitor: pain, mobility, strength, swelling
Following an indicator means avoiding decisions based on gut feelings. Keep four things in mind: daily pain, mobility, strength, and swelling. If one of these deteriorates, you adjust. If everything improves, you can increase a parameter.
Pain is not the enemy. It is a signal. The problem is the pain that causes you to change your movement or that persists during rest. Swelling is often an indicator of local overload. Mobility, on the other hand, tells you if you are tightening up. And strength shows you if your grip, rotation or traction are returning.
This monitoring is particularly useful for regular climbers who perform activities close together (climbing, bouldering, spray wall). Without a reference point, you end up putting too much pressure on yourself without realizing it.
Four indicators are sufficient: pain, mobility, strength, swelling.
A deterioration = you adjust immediately, even if it «passes» for the moment.
Monitoring protects against invisible peaks.
Simple tests: suspension, push, rotation
Choose tests that are easy to reproduce and always identical. For the fingers: very light suspension on a comfortable grip, without arching. For the shoulder: push against a wall, controlled elevation, then gentle external rotation. For the elbow: light tightening, then external arm rotation.
Your rule: you look for symmetry and control, not performance. If you have to cheat, it’s too early. If the test is neutral and the post-test reaction remains neutral, you can progress.
Avoid «heroic» tests at the end of the session. Do them at the beginning, in silence, to obtain a clean signal.
Reproducible tests, always identical: that is the key.
Control and symmetry are more important than maximum load.
Test quietly, not at the end of the session.
Summary table: common symptoms and immediate action
| Symptom | What it often suggests | Immediate action |
|---|---|---|
| Pain in the finger on the arch | Additional tendon/pulley surcharge | Stop, gentle test, avoid arching and dynamic movement, technical recovery on open pitches |
| Loss of grip in the pliers | Functional deficit to investigate | Protection, relative rest, strong reduction of constraints, advice if persistent |
| Painful elbow after volume | Extender/forearm surcharge | Reduce volume, technical work, controlled strengthening, relaxation between movements |
| Shoulder that clamps upward | Irritation + lack of stability | Reduce the range of motion in traction, strengthen the shoulder joint/shoulder girdle stability, and gradually reintroduce it. |
| Persistent nocturnal pain | Irritation that does not subside | Clear reduction in workload, reassessment of habits, consultation if no improvement is observed |
A simple matrix avoids emotional decisions after a «bad day».
If a red signal appears, you change your strategy immediately.
Repeat the same tests to measure the progression.
When to consult: deadlines and red flags
Check quickly if you have a deformity, a loss of net strength, sensitivity problems, or if the pain at rest increases. Also check if the progression stagnates despite a decrease in load and a recovery on its own. The right timing is when you are still gaining time: the longer you wait, the more the compensations take hold.
If you are using your insurance, be sure to read the legal provisions regarding coverage and deadlines: this is often where the administrative constraints lie.
Deformation, deficit, nervous disorder: quick advice.
Stagnation despite adaptation: reassess, then follow the guidance.
Administration also counts: anticipate.
First aid for climbers FAQ
Should cold or heat be applied first?
Cold is usually the first choice right after acute pain, especially if there is a sensation of pulsation or the beginning of swelling. It is mainly aimed at relieving the pain. Heat is more useful later, when stiffness dominates and you are trying to move more easily. If the cold numbs or irritates the skin, stop and prioritize relative rest and gentle mobility.
When is pinching a finger counterproductive?
The strap becomes counterproductive when it replaces a reduction in load. If it allows you to continue pushing with the same arch or volume, you mask the signal without resolving the cause. It is also counterproductive if it cuts off circulation, if it blocks the joint to the point of altering your movement, or if it creates friction that triggers a skin pain.
How much rest after a pulley pain?
There is no universal duration, because gravity varies. The right reference point is functional: you resume when daily life is neutral, the clamp does not cause severe pain, and the gentle tests remain stable the next day. If the pain appeared with a «pop,» a loss of strength, or rapid swelling, the resumption should be more cautious and guided.
What to do if the shoulder cracks without pain?
If the cracking is painless and you retain strength, mobility, and control, instead of panicking, watch it carefully. Work on stability: control of the shoulder blade, controlled rotations, and avoid piling up dynamic movements if you feel fatigue. However, if the noise is accompanied by a loss of strength, instability, or nocturnal pain, adjust strongly and have it evaluated.
What signs indicate the need for immediate consultation?
Visible deformation, a crack followed by a deficit, a loss of net grip strength, persistent tingling, pain at rest that increases, or nocturnal pain that wakes you up are strong signals. Also check if, despite relative rest and clear adaptation, function does not improve. The longer you wait, the more likely you are for compensatory mechanisms to maintain the pain.
You don’t need a complicated protocol to properly manage climbing injuries: you need quick decision-making, simple assessment, and disciplined progression. Stop the aggravating mechanism, clarify the signals, treat the area precisely, then resume by setting a new parameter while climbing. If you do this, you reduce the recurrence rate and protect your enjoyment of climbing, both indoors and outdoors, whether you buy your equipment from a specialist like Vieux Campeur or elsewhere.
 Français
 English (UK)


